Making good food at home without breaking your budget

Friday, June 10, 2016

Strawberry-Pretzel Squares (Lightened Up)

Back in the 1990's, everyone was making Strawberry-Pretzel Pie.  And lately it's been making a comeback.  My version is a much lighter, with less sugar and fat, yet all the taste.  I've been making it this way for years, and when I take this to parties and B-B-Qs, everyone really likes how light and delicious it is.  This recipe makes a 9 X 13 pan.
You will need:
1 1/2 cups finely crushed pretzels
1/2 cup splenda
1/2 cup butter, (or margarine)
1 1/2 (8 oz pkg each), Neufchatel Cheese
2 Tabs. skim milk
1 cup thawed light Cool Whip
2 cups boiling water  / 1 1/2 cups cold water  /  1 pkg Sugar Free Strawberry Jello
4 cups sliced strawberries
Preheat the oven to 350 degrees

Into a 9 X 13 pan, combine the crushed pretzels, 1/4 cup splenda, and butter, (melted).
 Press into the bottom of the pan and bake for 10 minutes
Remove from oven, let cool on wire rack.
In a medium bowl, beat together Neufachatel cheese, 1/4 cup splenda, and milk until well blended.
Stir in the thawed Cool Whip.
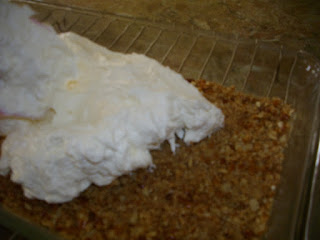
Spread over the cool pretzel crust.
Smooth out.  Refrigerate until Jello is set up.
In medium bowl add boiling water to Jello and stir until dissolved.


Add the cold water to Jello.  Refrigerate for 1 1/2 hour until thickened.
Once the Jello is thickened, stir in the sliced strawberries.                                

Spoon the strawberry/jello mixture over the top of the Neufchatel layer.  Refrigerate for 3 hours, or until firm.
Slice and serve.
This has a wonderful light creamy flavor, and the pretzel crust is a delicious alternative to a graham cracker crust.
It will remind you of a cheesecake, without all the guilt of cheesecake calories, fat, and sugar.

Give this lightened up version a try.  You'll enjoy it, and so will your family and guest.  It's always been a hit at my parties and B-B-Qs.

Enjoy !


Wednesday, June 1, 2016

Easy Homemade Pudding

 Most people who eat pudding, have boxes of this on their pantry shelves.  It usually costs 60 cents to $1 a box, (plus the milk), and it's loaded with lots of artificial flavors and chemicals.  I usually make my own for about 25 cents, (plus the milk).  It only takes about 15 minutes and it tastes so much better.   There's only 1 pan, and no mixer involved.  Let me show you.

Today, I am going to make vanilla, at at the end, I will tell you how to make variations of flavors.
You will need:
1/3 cup sugar
1/4 cup corn starch
1/8 teas. salt
2 3/4 cup milk
2 Tab. butter
1 teas vanilla extract
In a 2 quart saucepan, mix together the sugar, salt, and cornstarch.

Note:  if you are watching your sugar intact, you can use a sugar substitute.  I have many times, and it still taste just fine.   Make sure to whisk everything together well.
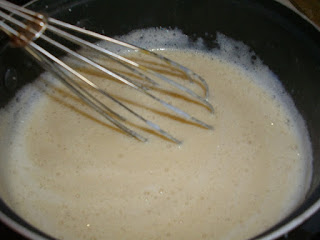
Slowly whisk in the milk, making sure to incorporate all the sugar mixture.  Scrape along the edges of the bottom of the pan.  Turn on the stove to medium high heat.  Stirring consistently, (so the milk does not burn), bring the milk to a boil.  Cook for 1 more minute.

Note:  you can use whole milk, skim milk, 1% or 2% milk - the choice it yours. - I usually use skim milk.
Once the mixture comes to a boil, add the vanilla and the butter.
Whisk in well, and remove from heat.

Note:  If you want your vanilla pudding to be very white, use clear vanilla.
Pour into individual serving dishes, (or one large bowl).  This recipe will make 2 1/2 cups.  Cover with plastic wrap, (to prevent a skin from forming on top of the pudding).  Refrigerate until cool.
Once the pudding is chilled, it is ready to enjoy.
You will notice it has the same smooth rich taste that the box puddings have, but none of the chemicals or artificial taste.

Note:  for variations:
Butterscotch:  replace the white sugar with 1/2 cup of firmly packed brown sugar
Banana: When you add the vanilla and the butter, add 2 ripe mashed bananas that you have added 2 tsp of lemon juice, (to prevent the bananas from turning brown).
Dark Chocolate: Add 1 square, (1 ounce), of unsweetened chocolate, (broken into pieces), when you add in the milk.

Enjoy !

Monday, May 23, 2016

Lemon Rosemary Roasted Chicken

Today so many people buy their roasted chicken from the big box stores, (and yes I am also one of those, that when strapped for time, will pick up a $5 to $8 roasted bird and add homemade sides for a quick dinner).  But, with some time, I can prepare a much juicier, and better tasting oven roasted chicken for less money.  And I get to decide what flavors my chicken will have, I don't have to settle for what's available.  Tonight, we're having lemon rosemary chicken.  I buy whole chickens when they are on sale, (and on sale I mean in the range of less than 75 cents a pound.  I will usually get my chickens around 66 to 69 cents a pound and then I will buy 4 or 5 for the freezer).  Tonight, I'm going to fix a nice 8 pound roaster that was on sale for 58 cents a pound, (we will easily get 3 or 4 meals from this one bird)!

You will need:
1 nice size roasting chicken
l lemon
a couple springs of rosemary
kosher salt
fresh ground black pepper
onion powder
garlic powder
olive oil
(you can substitute the lemon and rosemary with any flavors you like)

Preheat your oven to 375 degrees
First grate the rind from the lemon
Next, slice the lemon in thin slices
Strip the rosemary from the stems, and cut into small pieces.
In a small bowl, combine, 1 Tablespoon of fresh ground black pepper, 1 Tablespoon of kosher salt, 1 teaspoon garlic powder, 1 teaspoon onion powder.
Add the lemon zest.
Add the chopped rosemary. Stir together well.
Make sure to remove the neck and giblets from the inside of the chicken, (save these for making chicken broth later).   Pat the exterior of the bird dry.
Place about 2 Tablespoons of kosher salt in your hand.
Rub the salt all over the inside of the bird.
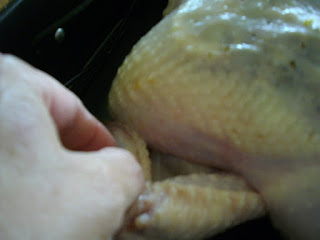
Now gently run your hand under the skin of the bird and loosen it from the meat.
Don't forget to do the thighs and legs.
Using 1/2 of the herb mixture, spread it between the skin and meat of the chicken.  This will give the meat of the chicken that wonderful herb flavor.  Don't forget the thighs and legs.
 Now lays some lemon slices on top of the herb mixture.
If you have any lemon slices left over, throw them inside the chicken cavity.
Now tuck the chicken wings under the front of the bird, (this way they don't burn).
Pull the skin closed over the back end of the bird to seal close the meat and the cavity, (I use a toothpick to keep the skin closed.
Now drizzle a small amount of olive oil over the chicken and rub it into the skin, (this will give you a nice brown crispy skin).
Spread the rest of the herb mixture on top of the olive oil.

Bake the chicken in the 375 degree oven until the chicken is completely cooked, (usually 1 1/2 to 2 hours).  Because my bird is to large, it will take about 2 hours.  A thermometer is best if you're not sure if the inside is done.
It's been 2 hours, the chicken is done,and it has a nice golden exterior and the interior is well cooked.  I removed the chicken from the oven and let it set for 10 minutes so the juices could redistribute in the bird before I cut into it.   Make sure to remove the lemon slices as you cut your chicken.
These chicken pieces are so juicy, and the lemon flavor is wonderful!!

Tonight we are having our chicken with some noodles and creamed spinach.

And remember, you can change up the herbs and make the chicken a different type every time you roast one.  And the whole house smells wonderful from the chicken cooking in the oven.  Give it a try, your family will love having chicken made at home.

Enjoy !

Tuesday, May 17, 2016

Naan Bread

Whenever my husband and I go out to our favorite Himalayan/India restaurant, we always order naan.  Sometimes we get the cheese naan, sometimes we get the garlic, sometimes we get just plain naan.  But we always have the same conversation; ME: You know we're paying $4.00 for 2 pieces of bread, and I know how to make 4 times this amount for about $1."   HUSBAND:  Yea, then why don't you?"  Same conversation, every time!  So - today I decided to make the bread.  I already had the recipe, and the ingredients are so few.  It does take some time, but it's so simple.  Let me show you.
You will need:
1 tsp. kosher salt
3 cups all purpose flour
1 stick butter
3/4 cup water
In a medium bowl, whisk together the flour and salt.
Melt 6 Tablespoons of butter and add to the flour.  Mix in well.
Gradually add in the water.  Stir until the the dough comes together.
Turn the dough out onto a lightly floured surface and knead until the dough is smooth and shiny, (about 5 minutes), and forms a ball.
Wrap the dough in plastic, and let the dough rest for FOUR, (4), hours.
After four hours, divide the dough into 10 equal pieces, and roll each piece into a ball with the palm of your hand.  Place the dough balls on a baking sheet.
Cover the dough with plastic wrap and let rest for 15 minutes.
Because I want to flavor my naan, while the dough was resting I gathered some items together - garlic, fresh chives, fresh rosemary, shredded cheese.  You can leave your bread plain or flavor it with whatever you would like.
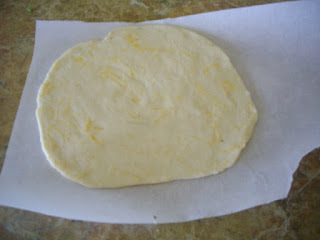
After 15 minutes roll each dough ball out in a very thin piece, (using a rolling pin), on an unfloured surface.  Try to make it round or oval, (if possible).
Using the remaining softened butter, lightly brush the top of the dough.
Sprinkle some topping on the dough.

I am going to make a couple of cheese naan breads.
Next tightly roll up the dough onto itself, to create a long rope.
Now, wind the rope into a tight coil.
I am also going to make a couple of garlic and chive naan breads.
And, a couple of rosemary and lemon zest naan breads.
And finally, some plain naan, (just buttered and rolled up).
After you have rolled up all the dough, Use the rolling pin and flatten each coil into a very thin round, (or oval), no more than 1/4 inch thick.
 The thinner the better.
You can stack the dough, with parchment paper between each slice.
When you have all the dough rolled out, working with one slice at a time, using the last of the softened butter, brush both sides of the dough very lightly.

Using a cast iron skillet or griddle- heat the skillet over medium-high heat.
When the skillet is hot, add the dough, (one at a time), and cook for about 2 minutes.
Flip over, and cook for another 2 minutes on the other side.

Notice the lightly blistered coloring.  you want to make sure the bread is cooked through.
When the bread is done, transfer to a baking rack to cool.
The cooking process goes very quickly, and in no time, you will have all your bread cooked and ready to eat.
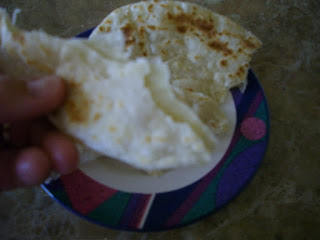
Notice how flaky the bread is.  This is a slice of the plain naan.


I made a quick cucumber sauce - YUMMY !

It's also good with a light butter or honey.

Tonight we are having these with roasted chicken, cucumber sauce, and pinjur, (a roasted red pepper sauce).

Leftovers store very well in a plastic bag in the refrigerator, or they can be frozen.

Give these a try.  And don't be afraid to mix different flavors in your bread.

Enjoy !