Making good food at home without breaking your budget

Wednesday, July 23, 2014

Stuffed Baked Zucchini

The garden is starting to produce zucchini, and one of the favorite dishes around our house is stuffed baked zucchini.  It's so easy, inexpensive, and very delicious, (and since the grand kids are willing eat it, I don't tell them that it's also good for them).  So, let's get started:
Preheat your oven to 400 degrees.  Line a baking pan with foil, and spray it with a little cooking spray.
This recipe will easily feed 4 - 6.  You will need:

2 good sized zucchini
2 tablespoons olive oil
3/4 teas salt
1/4 teas black pepper
2 Tabs butter
1/2 cup onion, diced
1 cup of stuffing mix, (either chicken or turkey flavored)
1 (10 oz pkg) frozen chopped spinach, (thawed)
1/2 cup sour cream
1 cup shredded Cheddar cheese
Wash the outside of your zucchini, then cut in half lengthwise.  Brush the cut side with the olive oil.
Sprinkle with salt and pepper
Place the zucchini cut side down in the baking pan, and brush the outside with more olive oil.  Bake in oven for 15 minutes.
While the zucchini is baking, mince the onion
Drain, and squeeze the liquid from the spinach.
Measure out 1 cup of stuffing mix, (if you don't have stuffing mix, you can mix poultry seasoning with some toasted crushed bread crumbs).
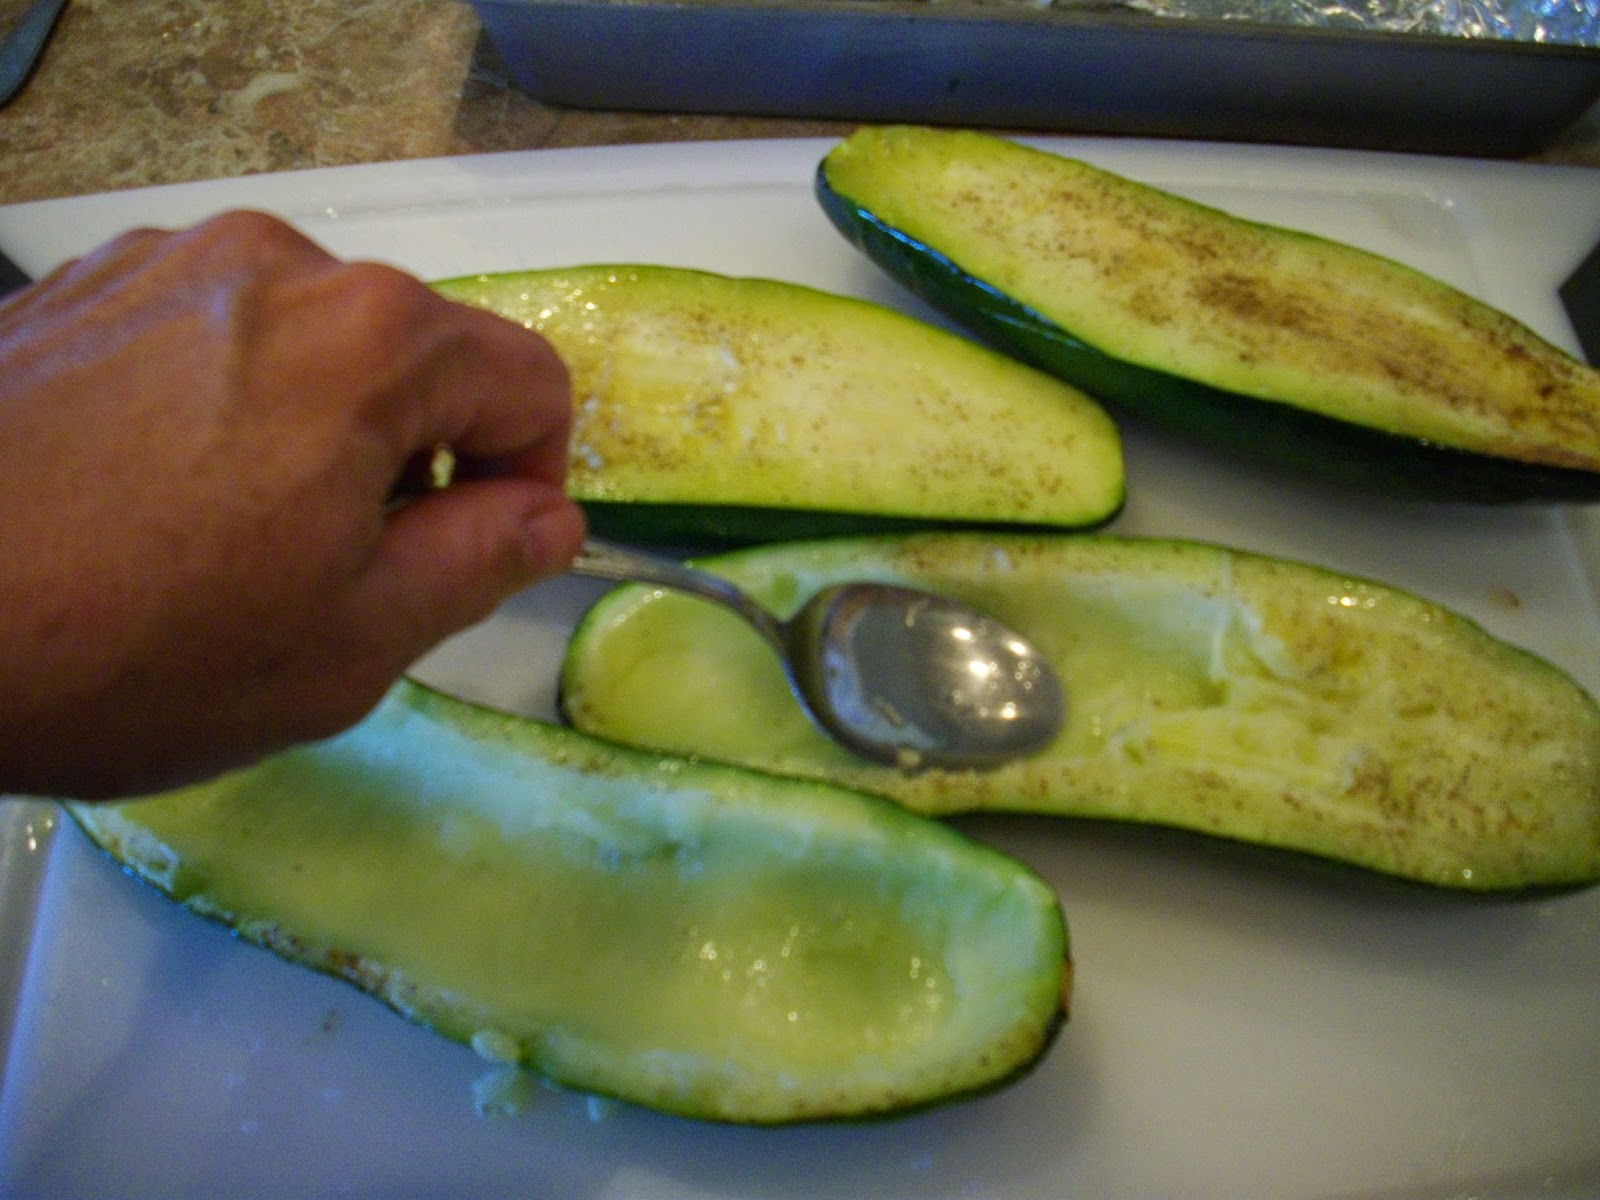
When the zucchini is done baking the pulp will be tender, remove from oven, reduce the heat down to 350 degrees, scoop out the pulp, keeping the outer shells intact.
Put the shells back in the baking pan, cut side upward.
cut up the zucchini pulp
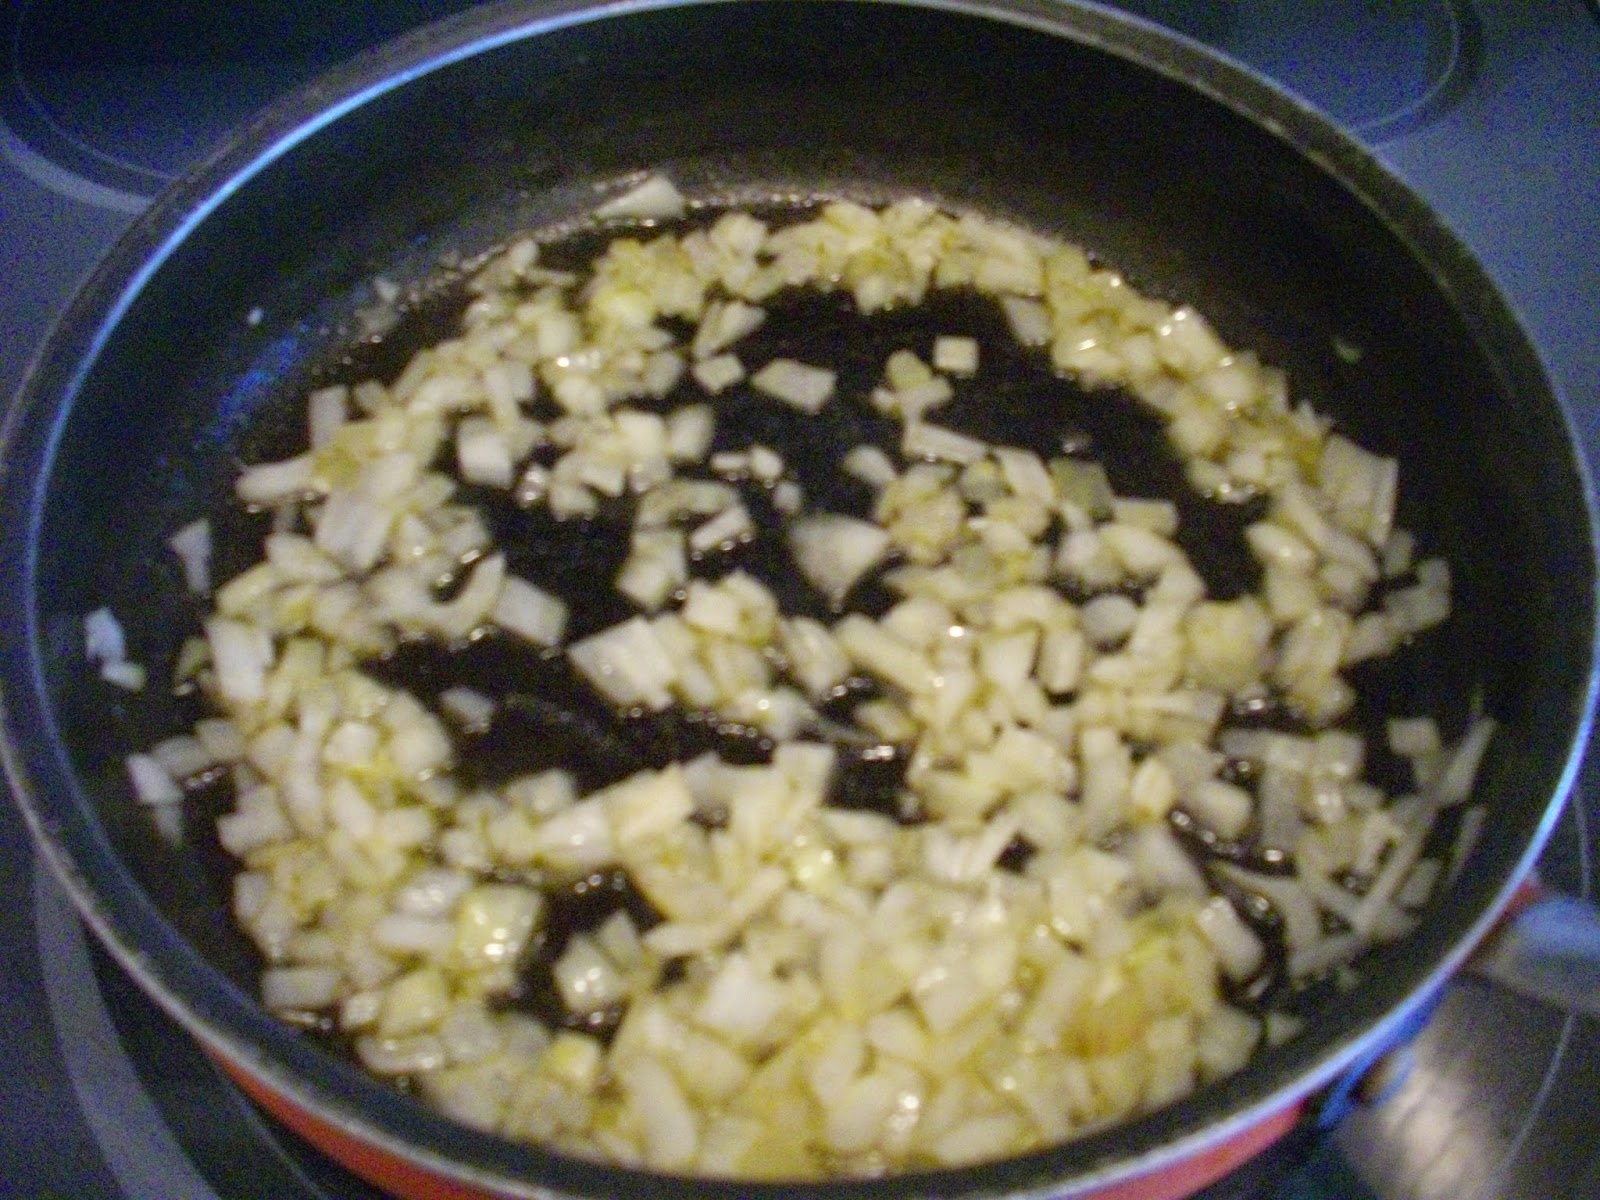
In a large pan, melt the butter over medium heat.
Saute the onion, just until it is transparent, (about 5 minutes).  Be sure to salt and pepper your onions to add flavor and bring out their moisture.
Now add the stuffing mix, spinach, and sour cream.  Stir together.
Next, add in the zucchini pulp and the Cheddar cheese.  Mix in well.
Make sure to add salt and pepper.  (I also usually add 1 Tabs of garlic powder, but this is optional.)  Cook mixture for about 3 minutes, so the cheese starts to melt.
Spoon the mixture into the shells.  Make sure to pile it high.

I have to do this while the family is out of the kitchen, (or else they want to eat the stuffing mixture right out of the pan, and I don't have enough for the shells).

 Bake it for another 15 or 20 minutes, (depending on how hot your oven bakes), until heated through.
And there you have it - Stuffed baked Zucchini!!

So yummy!!
You can serve a whole shell on a plate, or cut the shell in half.  This recipe will easily serve 4 - 8 people, (depending on how large your zucchini are - the bigger zucchini can serve 4 each).


Next up - watch for my famous Chocolate Zucchini Bread!!!

Friday, July 18, 2014

Watermelon Cherry Ginger Granita

The weather is HOT, HOT, HOT.  No one wants to move, and everyone wants something cool and delicious.  So, I've been making different flavors of granita for everyone to enjoy.  They are so easy, and very inexpensive to make, not to mention cool and refreshing!!

You will need 1/2 of a medium sized watermelon
3 cups of pitted sweet cherries
fresh ginger
lemon juice
Peel, cut, and seed your watermelon into chunks.  You will need about 6 cups of melon.  You can purchase a seedless melon if you don't like spending the time removing the seeds, but you can just use a fork to remove the seeds really fast from the melon.
Grate 2 Tabs of fresh ginger


Now add your melon, cherries, and ginger to a blender.

Puree for about 45 seconds.

 Everything will be nice and smooth.
Now add 2 Tabs of lemon juice, and blend for another 30 seconds.
 Pour your mixture into a metal baking pan.  Place the pan into the freezer for 4 hours
 When you remove it from the freezer, it will be partially frozen.
Use a fork to and scrape all the mixture, starting at the top and working your way to the bottom.  Put the mixture back into the freezer for another 4 hours.
After the 2nd 4 hours, (8 hours total), this is what your fruit mixture looks like.  Again use a fork and scrape the mixture from the top to the bottom.  
You now have a wonderful delicious tasting watermelon/cherry/ginger granita dessert.  The hardest part was waiting for it to freeze!!
Here is a watermelon/mango granita dessert that I made with the other half of my watermelon - so yummy!!!  Now go make some, and have a wonderful relaxing cool afternoon.

Note:  if you want to make granita using other fruits, (i.e.: strawberries/blueberries/mango - anything other than watermelon, then you will need to add a simple syrup to the blender.  But if you are using watermelon, the fruit will have enough sugar and water that there is no need for the simple syrup).

Wednesday, July 9, 2014

Fried Onion Rings

Sometimes when you have a hamburger you want something yummy and crunchy.  But you don't want french fries.  These onion rings are just the thing.  They are so easy, quick, and inexpensive.

1 or 2 large yellow onions, the bigger the better!!
1 1/4 cup flour
1 teas baking powder  (this is the secret)
1 teas salt
1 egg
1 cup milk
1 3/4 cup bread crumbs
vegetable oil for frying
salt for seasoning


Slice your onions into 1/4 inch slices and separate them into rings
In a medium bowl mix your flour, baking powder and salt.  Make sure to stir well.


Drop your onion rings into flour mixture and turn them over several times to make sure they are well coated.


Set the onion rings aside.


 Now is a good time to get your pan of oil started heating over medium heat.  You can use a dutch oven pan, or a heavy skillet.  You want to get your oil heated up to 365 degrees. (If you don't have a thermometer, you can test it by dropping a tiny little piece of the batter in.  If it fries quickly, your oil is ready).


Now, into the flour mixture, (the same that you used to coat the onion rings),  add your egg and milk.
Stir well until you have a smooth batter.
It will look like this.


Put your bread crumbs in a pie tin, or a plate


Dip each onion ring into the flour batter, coat the onion rings and shake off any excess batter.
 Next dip the onion rings in the bread crumbs, making sure to coat them well.
 Gently place the onion rings into the hot oil, frying them for about 3-4 minutes on each side.  Don't over crowd your pan, or the onion rings won't crisp up, (they will tend to steam rather than fry).
 When your onion rings are nice and golden brown on both sides,  Remove from the oil to a paper towel to drain off any excess oil, add a little salt for seasoning, and proceed with frying the next batch of onion rings.
And there you have a nice serving of fried onion rings for your family.  These go great with any condiment, (ketchup, aioli sauce, or as they serve them here in Utah - fry sauce)  Give these a try and your family will be asking for more!!


Thursday, July 3, 2014

Fresh Dill and Onion Dip

The end of June brings green onions and fresh dill from my garden.  This also means that I will be asked to supply our holiday cookouts with my dill and onion dip - starting with the 4th of July through Memorial Day.  I have been making this dip for years, and it is the first dip bowl to be cleaned out completed, while others are left untouched.  The great thing about this dip, is it doesn't have any preservatives and isn't loaded with tons of salt, (like the store bought varieties and those pre-made packets you buy).  This recipe serves 8, and you can easily double the recipe for 16.

4 oz cream cheese, at room temperature
1/2 cup sour cream
2 green onions
1 Tabs fresh dill
1 clove garlic
1/4 teas salt
finely chop your green onions
chop your dill, (don't use the stems)

Note:  if you don't have fresh, you can use 1/3 Tab of dried dill, (but it just won't be as yummy as using fresh dill).
finely chop your garlic  Note:  if you don't like garlic, you can omit the garlic, (but it sure does add a lot of flavor).


In a medium bowl cream your sour cream and cream cheese, using a mixer until smooth.
Now add your onion, garlic, dill and salt.  Stir together.
Now, I place it in a smaller container and refrigerate for 30 minutes.  That's all that's required!!
You now have a delicious dip for veggies, chips, etc.

NOTE:  in a pinch - I have substituted mayo for my cream cheese.  It works OK, but the cream cheese flavor just seems to give it that something extra that everyone loves.

Now, you have a great dip for your 4th of July cookout and you won't be feeding your family a ton of salt.