Making good food at home without breaking your budget

Monday, May 25, 2015

Lemon Poppy Seed Bread

I just love lemon desserts, lemon breads, lemon pies, lemon cakes, lemon anything.  Those who have tried my Lemony Lemon Bread know the more lemon the better.  But sometimes, I only have 15 minutes to put together something for a quick bread - that's where my Lemon Poppy Seed bread recipe comes in.  This recipe is delicious, quick, only takes 15 minutes to come together, then just pop it into the oven for 1 hour.

You will need:
1 1/4 cup all purpose flour
1 1/4 tsp baking powder
1/2 tsp kosher salt
1 lemon
2 large eggs
1 Tabs poppy seeds
1 cup lemon yogurt
1/4 cup sugar
1/2 cup oil
1 tsp vanilla extract
cooking spray


First preheat your oven to 350 degrees, spray coat a 8 1/2" X 4 1/2 " loaf pan

Grate the zest from the lemon - you want 2 teaspoons of lemon zest.

Save the lemon, we are going to juice it for the glaze over the top.
In a medium bowl, combine:
flour
baking powder
salt

Whisk together
In a large bowl, whisk the eggs just until slightly mixed together.
Add the lemon zest and the lemon yogurt.

Whisk together to incorporate.
Add the poppy seeds, whisk just to incorporate.
Add the vanilla, whisk just to incorporate.
Add the oil, whisk just to incorporate.

(I like to use Canola oil, but not a necessary)
Add the sugar, whisk just to incorporate.
Add 1/2 of the flour mixture, whisk just to incorporate.
Add the remaining flour, and whisk just to incorporate.
Pour the batter into the prepared pan.  Bake, (for approximately 1 hour) until golden brown.
While the bread is baking, prepare your glaze topping.

You will need;
1/2 cup of confectioner's sugar
1 Tabs lemon juice (from the lemon)
Squeeze the juice from the lemon
In a small bowl measure the sugar.
Slowly stir in the lemon juice to form a smooth glaze.
Make sure your glaze has no lumps.
Once your bread has cooked, you should be able to insert a toothpick into the center and it will come out clean.  (about 55 - 65 minutes of baking time).
Let the bread cool for 5 minutes on a cooling rack, then slowly pour the glaze over the top, allowing the glaze to seep into the loaf.

Note, If you line your loaf pan with parchment paper, you can easily lift the loaf out, then sit it on a rimmed baking sheet to cool and pour the glaze over the loaf - that way you won't have to fear cracking or breaking your loaf when you remove it from the loaf pan.
After the loaf has cooled enough to handle, remove from the pan, and place on a baking rack to finish cooling.
Notice how moist and fluffy this bread is.
The layers are so delicious, and poppy seeds are distributed through out along with the lemon flavor from the yogurt and the zest.  The lemon glaze was just the right touch.

This make a great after dinner dessert, a perfect breakfast bread, a nice neighbor gift, (imagine opening a pretty ribbon wrapped parchment paper to find a loaf of lemon poppy bread - a lovely spring time gift!).

And it only takes 15 minutes to get it in the oven.

Enjoy !

Monday, May 18, 2015

Homemade Hot Pockets

At our house, hot pockets are something that we rarely buy, (unless on sale at a price cut so low I can't pass it up).  We consider them a quick Saturday lunch, or my husband will have one in his lunch, (about twice a year), when I forget to plan leftovers for him to carry.  We don't purchase them very often, because they are expensive, full of products we can't pronounce, and they usually sit in the freezer for months before we get around to eating them.  One day, I got to looking at a package in our freezer, and thought, "these are basically just a biscuit wrapped around filling.  I can make several of these for 1/4 the cost of one box".   And so began the trial and error to come up with my homemade hot pockets.  This recipe will give you 8 hot pockets, for the cost of 1 box at the grocery store.  Today, I am going to make Broccoli and Cheese with Chicken Hot Pockets
You will need:
1 can of large sized biscuits, (usually called grand sized and there are 8 in a can)
1 12 oz package of chopped broccoli
butter
1 cup shredded cheddar cheese
1 cup milk
2 Tabs flour
2 cups shredded chicken
dried parsley flakes
garlic powder
salt and pepper

First you need to make a basic broccoli cheese sauce.  In a medium sauce pan over medium heat, melt 2 Tablespoons of butter.
Add 2 Tablespoons of flour.  Cook the flour for a couple of minutes, to remove the flour taste.
 Add 1 cup of milk.
Add 1/2 teaspoon of ground pepper and 1 teaspoon of salt, stir and continue cooking until the mixture starts to thicken.
Once the mixture has started to thicken, add the shredded cheese, and continue stirring until the cheese melts.
Continue stirring until the sauce is smooth.  Remove from heat.
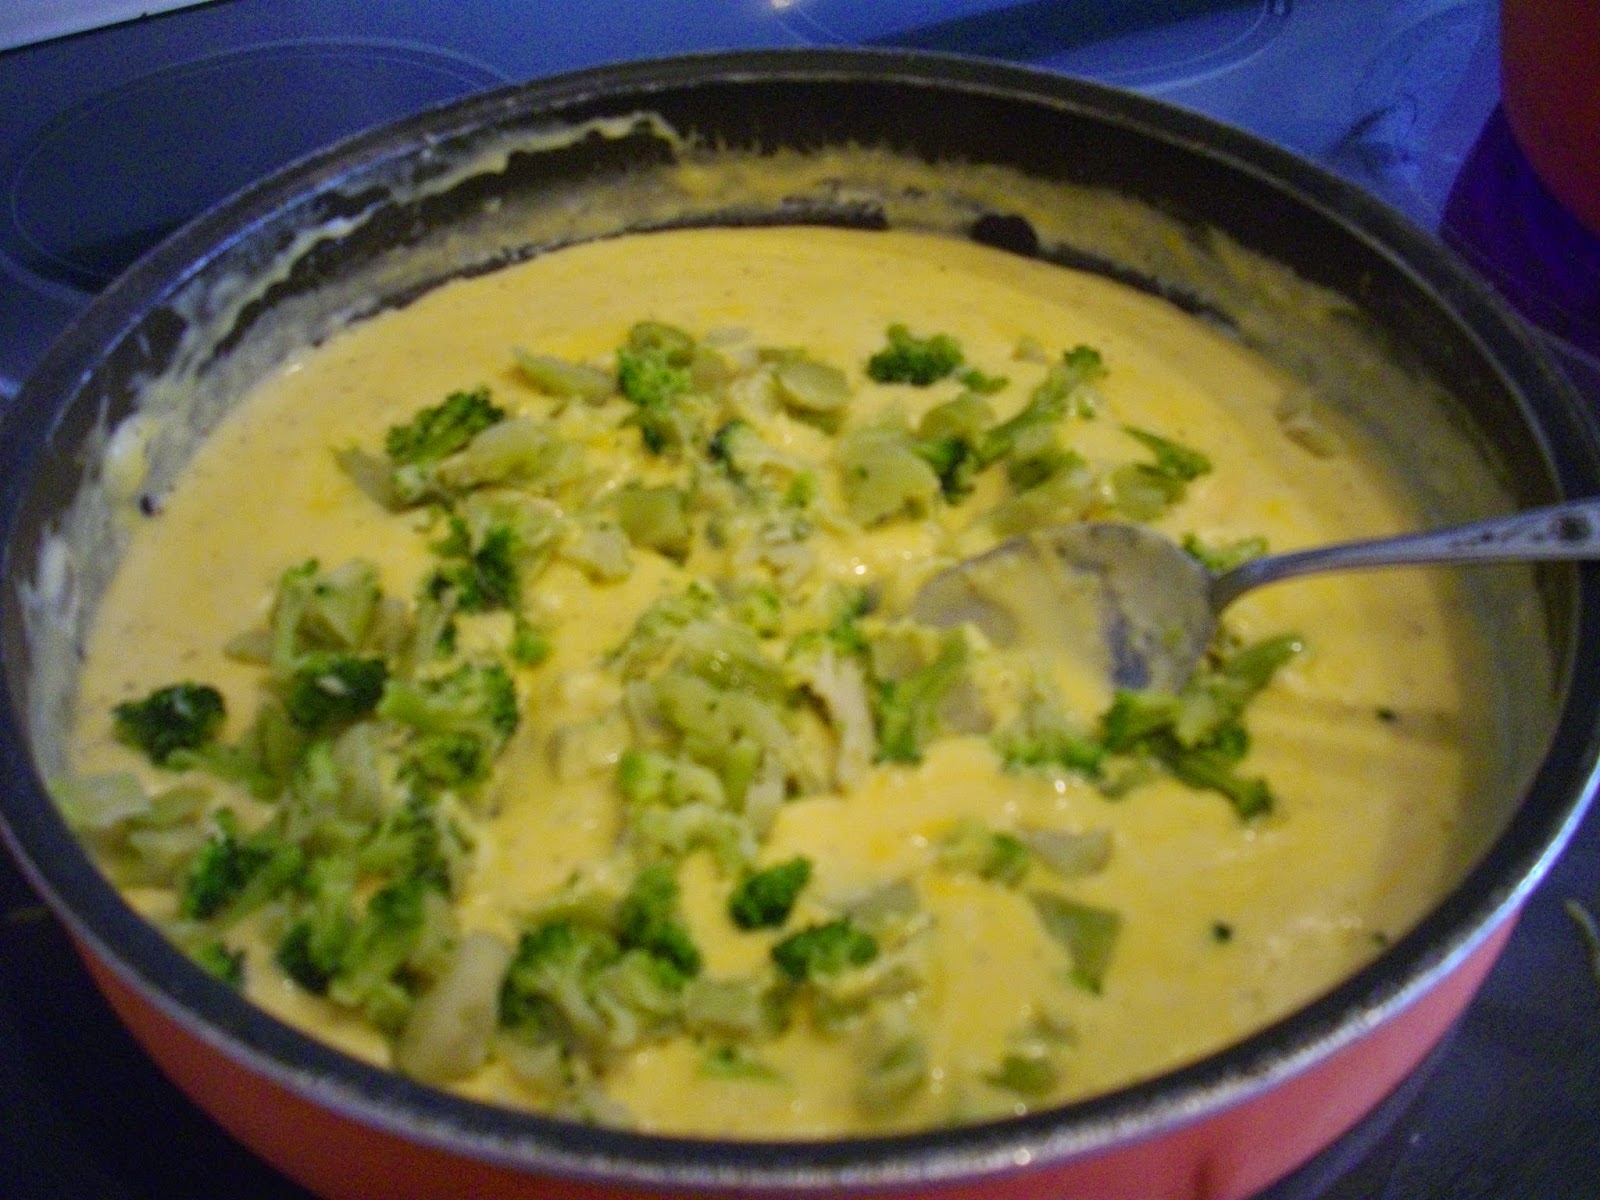
 Add the broccoli, and stir into the cheese sauce.
You now have a basic broccoli cheese sauce.  This is good just like this to serve as a side dish.


NOTE:  if you are using frozen broccoli, first you will need to defrost the broccoli and drain of all water.  You can also use fresh cooked broccoli.  
In a small bowl, melt 4 Tablespoons of butter
Add 1 teaspoon of garlic powder and 1 teaspoon of dried parsley flakes.  Stir to incorporate.


Now, preheat your oven to 375 degrees.
Lightly spray a baking sheet with cooking spray.
Separate the biscuits, and roll each biscuit into a 6 inch round.  Layer your chicken on half of the biscuit.

Note:  I started with 1/4 of a roasted chicken, This gave me more than enough chicken to get 2 cups of shredded chicken.  Plus, I then used the bones to make chicken stock while I was making my hot pockets.  So the next time I need chicken stock, I will just go to the freeze and have homemade stock, for free.

You could substitute canned chicken if you don't have a roasted chicken.
On top of the shredded chicken layer about 2 heaping Tablespoons of broccoli cheese sauce.
Pull top half of the biscuit over the filling and bottom half of the biscuit.
 Now seal the edges well, so the filling doesn't leak out.

NOTE:  if you have a good biscuit recipe, you can also take the time to make your own biscuits, (which will cut the costs and increase the flavor even more).

Sealing the edges can be done with your fingertips, the edges of a fork, or even rolling the edges of the dough over.  I just press the dough with my fingertips and it seals nicely.
 Brush the top edge of the biscuit with the melted butter mixture.  Place the biscuit on the cooking sheet, BUTTERED SIDE DOWN.
 Brush the top side of the biscuit with melted butter mixture.  Now both sides of the biscuit are coated with the butter mixture.
Once you have all your biscuits completed, bake in oven for 20 minutes or until golden brown.


NOTE:  if you plan on freezing your hot pockets and reheating them for later use, only cook them for 15 minutes.  You don't want to get them too brown.  Then when you re-cook them they will continue to brown.
 As you can see, I used all the butter mixture and all the shredded chicken.
 I have just a small amount of broccoli cheese sauce leftover.
 This broccoli cheese sauce will be a nice side dish in my husband's lunch.  So into the refrigerator it will go.
 It's been 20 minutes and the hot pockets are done.  I have removed them from the oven and from the baking sheet.  They are cooling for a few minutes on a baking rack.  I wish you could smell how good they are!
Here is the inside of one.

Notice how much MORE filling there is than the store bought brand!
AWW, man - that's good.  Nice and cheesy with lots of chicken.  These are going to be a nice quick lunch.

Since I baked mine the full 20 minutes, when I reheat them, I will put them in the microwave for just a couple of minutes, (not the oven, I don't want them to brown any more).

You can change up your filling.  Try a marina sauce with some sausage, or pepperoni, or peppers.  Anything you like can be made into a hot pocket, even potatoes and vegetables.

Let me know what kind of hot pockets you made.  ENJOY !

Monday, May 11, 2015

Blueberry-Lemon Muffins

Many years ago, when my dear friend and co-worker, (Gayla), received her heart transplant, I decided that I would deliver her a box of 1 dozen freshly made muffins each week for one year.  Gayla loved muffins for breakfast, and I knew this would be the perfect thing to give her and her husband.  I could make them on Friday afternoon, deliver them that evening, and they would have the week to enjoy them.  I gathered together 50 of my best muffin recipes, so they would have a different batch each week for the year.  At the end of the year, I asked Gayla to choose the 2 types that she enjoyed the most for the last 2 weeks.  She said that rather then 2 different muffins, they would like to have my Blueberry-Lemon muffins for the last 2 weeks.  They said they so enjoyed opening the box and finding out what new flavor the week had in store, but when they took a bite of the blueberry-lemon muffins, that was in deed their favorite.  My husband loves anything that is blueberry, so when I make these muffins - I know they will again be enjoyed as much by him as they were many years ago by Gayla and Wayne.  I now share with you the same recipe.  This recipe makes 12 medium sized, (2 1/2 inch), muffins / 6 large sized muffins / or 1 loaf, (9" X 5"X 3"  pan).  The recipe comes together very quickly, and each muffin costs less than 30 cents to make.  A real deal compared to the retail cost of muffins at the market these days.

For the batter, you will need:
2 cups all purpose flour
1 cup sugar
1 Tabs baking powder
1 teas salt
6 Tabs cold butter
1 egg
2/3 cup milk
1 lemon
1 teas vanilla extract
1 cup blueberries
For the topping, you will need:
2 Tabs all purpose flour
2 Tabs sugar
2 Tabs butter
1/2 teas ground cinnamon / 1/2 teas ground nutmeg / 1/4 teas ground ginger

Line your muffin pan with muffin cups.


NOTE:  you can also spray the muffin tin, if you don't have paper muffin liners.
Grate the lemon and measure 1 teaspoon of lemon rind.
Squeeze 1 Tablespoon of lemon juice from the lemon.
Cut the 6 Tablespoons of COLD butter into small pieces.
Measure out the 2/3 cup of milk.
Slightly beat the egg.

Now that you have done the prep work, turn on the oven to 400 degrees, (350 degrees for a loaf).
In a large bowl, measure the flour, sugar, baking powder, and salt.  Stir together to mix.
Add the 6 Tablespoons of cut COLD butter.  Mix into the flour mixture.

Note:  you can use a pastry blender, knifes, forks, or as I do - the tips of the fingers.  I find that just using my fingertips to blend the butter into the flour mixture works well and allows me to know if I have any large lumps of butter that need incorporated.
You want the mixture to resemble fine crumbs.
Now into the milk, add the slightly beaten egg.
 Add the lemon zest.
 Add the lemon juice
Add the vanilla extract, and stir to mix together.


You don't want to do this ahead of time, or the milk will start to curdle.
Add the egg mixture to the flour mixture.  Stir just to incorporate.  Do not overwork the batter.
 Fold in the blueberries, gently (you don't want to mash the berries).


Note:  you can use fresh or frozen blueberries.  If you use frozen blueberries, you do NOT need to thaw the berries.   I like to buy my berries on sale and freeze them, then I always have them on hand for baking.
Spoon the batter evenly into the muffin cups.
 For the topping:
In a small bowl, combine
2 Tablespoons flour,
2 Tablespoons sugar
1/2 teaspoon cinnamon
1/2 teaspoon nutmeg
1/4 teaspoon ginger

Stir well.
Melt 2 Tablespoon of butter, add to the flour/sugar mixture.  Stir well.
The topping will look like this.
Sprinkle the topping over the muffin batter.

Bake for 20 minutes, (1 hour for loaf), until golden brown.
 It's been 20 minutes, and a toothpick comes out clean, when inserted in the center of a muffin.

Remove the muffins from the tin, and let cool for a couple of minutes on a baking rack.
As you can see, the inside of the muffin is very light and airy.  These delicious little cakes have wonderful layers of flavors.  As the cold butter lets off steam in the batter, it generated pockets of wonderful light airy deliciousness.

And the touch of lemon juice and lemon zest go so well with the blueberries.  Plus, there's not too much topping to overpower the muffin's wonderful taste.
 When you bite into the little cake, it is like heaven.
 And the blueberries are distributed evenly throughout the muffins.
These muffins are good whether you eat them warm, or cold, plain, or with a little butter or honey on them.  They are a great breakfast item as well as a snack item.

I hope you enjoy these luscious little cakes as much as my friends and family do.