Every couple of years sweet cherries are in abundance, and their prices go way low. This summer their prices have been below $1 per pound. And we have enjoyed eating them quite frequently. I have also put several bags in the freezer for us to have during the winter months. But sometimes, you need something new and different. I am not a big fan of the usual breakfast items. I love a slice of quick bread anytime of day for a fast snack. So, with cherries in season and at a great price, I decided to make a sweet cherry quick bread. It's very easy, and all the ingredients were already in the pantry. Let me show you how I did it.
You will need:
1 cup of cherries, coarsely chopped
1/2 cup of softened butter
1 cup sugar
3 eggs
1 teas of vanilla extract
2 teas. of almond extract
2 cups flour
1/2 teas salt
1 teas baking powder
1 teas baking soda
1 cup plain Greek yogurt
2 cups powdered sugar
1/4 cup milk
Preheat the oven to 350 degrees. Spray a bread loaf pan, (5 X 9), with baking spray.
Rinse, pit, and chop your cherries. You will need 1 cup of chopped cherries.
If you don't have fresh cherries, you could always substitute frozen cherries that have been thawed. But fresh will taste better.
In a large bowl, cream together the butter and sugar.
Add in the eggs, vanilla extract, and 1 teaspoon of almond extract, (you will use the other teaspoon for the glaze, later). Continue mixing until smooth and everything is incorporated well.
In a smaller bowl, combine the flour, salt, baking powder, and baking soda. Whisk together well to combine and break up any clumps.
Carefully add the flour mixture to the butter mixture.
Stir in the yogurt, until completely incorporated.
Fold in the cherries.
Spoon the batter into the greased loaf pan. Bake in pre-heated 350 degree oven for about 50 minutes, (until a toothpick inserted in the center comes out clean).
Allow the bread to cool on a baking rack for 15 minutes, then remove from pan.
Allow to cool completely.
In a small bowl, whisk together the powdered sugar, remaining 1 teaspoon of almond extract, and milk.
Once the bread has cooled completely, pour the glaze over the bread. Your bread is now ready to slice and serve.
I am going to put a few slivered almonds on top, so people will know there is an almond flavor in this bread.
Notice how nicely the bread has suspended the cherries throughout. And notice how the layers are light and fluffy.
WOW - this bread is so moist, and you get that very slight tang from the yogurt, the sweetness from the cherries, and it's all tied together with the almond flavor. This is wonderful. And it keeps so well, without being wrapped. Breakfast is going to be so good this week.
Get some sweet cherries, before they are all gone, and make a loaf for your family.
Enjoy !
Making good food at home without breaking your budget
Showing posts with label bread. Show all posts
Friday, July 27, 2018
Saturday, July 14, 2018
Date Nut Bread
You will need:
8 ounces of dried pitted dates
1 large orange
1/2 teas. baking soda
1/8 teas. salt
1 cup boiling water
2 cups all purpose flour
1/2 cup firmly packed brown sugar
1 1/2 teas. baking powder
1/4 teas salt
1/2 teas ground cinnamon
1/2 cup cold unsalted butter
1 large egg, room temperature
1 teas. vanilla extract
1/2 cup pecans or walnuts
1 teas sugar
First, coarsely chop the dates. Make sure to remove all the seeds. You should have about 1 1/2 cups of firmly packed chopped dates.
Grate the orange peel, (you will need 2 tablespoons). And juice the orange, (you will need 1/4 cup of juice).
Add enough boiling water to the juice to make 1 cup.
In a small bowl, add the boiling orange juice/water, baking soda, and 1/8 teaspoon of salt. Add the chopped dates. Stir well, then set aside and allow to cool.
Preheat the oven to 350 degrees. While the orange juice/water is cooling, spread the pecans, (or whatever type of nut you prefer to use), on a baking sheet. Roast the nuts for about 5 minutes, until they start to brown, and you just start to smell the nuts.
Notice how the nuts have darkened in color. Be sure to watch the nuts, they will go from roasted to burnt in just seconds. Remove from oven and allow to cool.
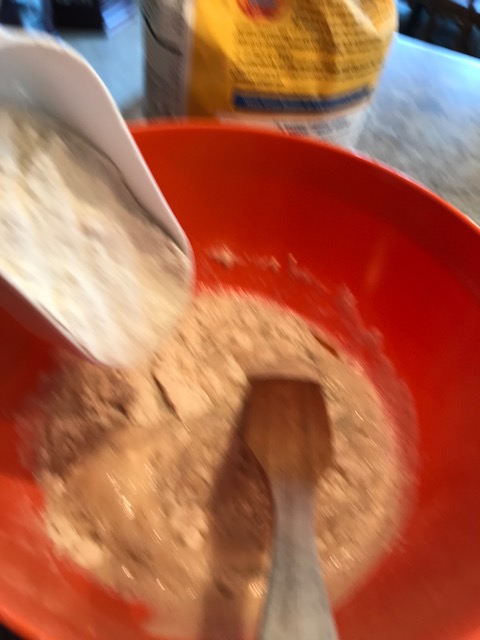
In a food processor, add the flour, brown sugar, baking powder, 1/4 teaspoon salt, cinnamon, and orange peel. Process just enough to combine.
Add the cold butter, and process until the mixture resembles coarse breadcrumbs.
This is what the flour mixture will look like. Add the flour mixture to a large bowl.
Coarsely chop the nuts, and stir into the flour mixture.
In a small bowl, add the egg and vanilla extract. Whisk the egg and vanilla together.
Add to the flour mixture.
Add in the dates and ALL of the orange juice/water.
Stir just until the mixture is combined.
Spray a bread loaf pan. Add a piece of parchment paper to the bottom of the pan and spray the top of the parchment paper, (this will ensure the bread removes easily from the pan).
Spoon the bread dough into the bread loaf pan.
Spread out and level the bread dough.
Lightly sprinkle 1 teaspoon of sugar over the top of the bread dough.
Bake in the preheated 350 degree oven for 60 to 65 minutes, (until a toothpick inserted in the center comes out clean, and the bread is golden brown).
Allow the bread to cool on a baking rack for about 10 to 15 minutes.
Remove the bread from the pan, and gently peel off the parchment paper. Turn the bread upright and allow to cool completely.
Your bread is now ready to eat.
However, if you can resist the temptation and let your bread sit for 1 day, the flavors develop even more, and it's much more tasty.
Notice how nicely the dates and the nuts are suspended in the dough, and the bread has a nice crumb.
You can taste the slight orange flavor, the warm roasted nut flavor, and the warmth of the cinnamon against the dates, (which also have a delicious orange undertone). It's so good!
And another way to serve the bread it with a small amount of honey on the slices - Oh my goodness, so good.
So go get some dates, while they are still in season and reasonable priced and try a loaf of date nut bread.
Enjoy !
Sunday, April 22, 2018
Italian Bread (Soft loaf)
At our house, we like a loaf of soft Italian bread for different kinds of sandwiches, (especially when we have Italian beef sandwiches). It doesn't take long to make a loaf, it's so easy, and it takes so few ingredients. Let me show you how I make it.
You will need:
1 packet of yeast
1 tsp sugar
1 cup warm water (110 - 115 degrees)
2 1/2 cups bread flour, (or all purpose)
2 Tabs olive oil
1 tsp salt
In a large bowl combine yeast, sugar, and warm water. Let it sit for about 5 minutes, until it blooms, (becomes foamy).
Add to the yeast olive oil, and salt, stir in.
Add in the flour, stirring in until completely incorporated.
I like to use bread flour, but you can use all purpose flour.
The dough will come together and become shaggy, (it will pull away from the sides of the bowl). It will be slightly damp. Turn out onto a lightly floured work surface and knead the dough for about 10 minutes.
You can add some more flour to the dough as you knead it so that it forms a smooth ball. You will know your dough is ready when you press a finger into the dough and it springs back. Place the dough in a lightly greased bowl, cover and allow it to rise until it doubles in size, (about 1 hour), in a warm place.
After 1 hour, this is what your dough will look like.
Place your dough on a work surface, and gently shape it into a 12-inch long batard, (torpedo).
GENTLY transfer the dough to a parchment lined, (or lightly greased), baking sheet. Cover the dough, and allow it to rise for 20 minutes.
Turn on the oven to 400 degrees, and allow the oven to preheat, and get nice and hot.
After 20 minutes, use a serrated knife and cut 3 or 4 quarter inch slits in the surface of the dough, (this allows the bread to bake evenly throughout). Bake the dough for 20 minutes, checking it during the last couple of minutes.
You want your dough to be nice and brown. I test my bread with an instant-read thermometer to make sure it reads 200 degrees internally when I pull it out of the oven.
Note: if you would like a crispy exterior, you can spray the exterior of the bread lightly with water after it has been baking in the oven.
Allow the bread to cool completely before slicing.
Notice the nice texture of the bread. And it tastes wonderful.
Sometimes when I want to add additional flavor inside the bread, I will add 1 teaspoon of Italian Seasoning to the dough when I add the flour. It gives the bread another level of flavor.
This bread stores very well.
Tonight we are having Italian roast beef sandwiches. This is just the bread for these sandwiches. It soaks up the juices from the meat and carries the heartiness of the meat and peppers.
Try this bread at your house.
Enjoy!
Subscribe to:
Posts (Atom)


