Making good food at home without breaking your budget

Wednesday, September 19, 2018

Brown Sugar and Honey Glazed Pork Loin Roast with Vegetables

Over the years, I've learned to watch the sales cycles that our local stores run.  Usually every 4 months they cycle items,  (chicken 1st month, beef 2nd month, fish 3rd month, pork 4th month, chicken 5th month, beef 6th month, and etc.).  Last week the local store was running a special on boneless pork loin, 99 cents per pound.  I found a 8.6 pound bag, marked down from $32.59 to $8.51.  And, I had a $2 store coupon on meat purchase.  SCORE ! A total savings of $26.08.  When I opened the bag, there were 6 beautiful pork loins.  I individually wrapped and vacuumed sealed and froze them, so we can enjoy them later.  Wish I would have purchased 2 bags.

Anyway, the other night, I made a brown sugar and honey glazed pork loin roast with vegetables.  It was so good.  A nice 2 pound roast will easily feed 4, (even 6 if you add enough vegetables).  Since the vegetables were from our garden, a very inexpensive meal.  Let me show you how I did it.
You will need:
2 pound pork loin roast
4 Tabs. brown sugar
2 Tabs. honey
2 Tabs. vegetable oil
2 pounds carrots
2 pounds potatoes
2 or 3 apples
salt, pepper, garlic powder
Preheat oven to 375 degrees.
Line a baking sheet with foil, (this is for easy clean up).

Clean and chop carrots and potatoes. 

Note:  Yes those are white carrots you see.  This year we planted multi-colored carrots, so we have orange, white, and red carrots.

Place the carrots on the baking sheet and drizzle with 1 Tablespoon of oil, sprinkle with 1 teaspoon of salt, 1/2 teaspoon of pepper, and 1 teaspoon of garlic powder.  Mix well to coat all the vegetables.
In a small bowl, combine 1 Tablespoon of oil, brown sugar,  honey, 1 teaspoon of salt, 1 teaspoon of pepper, and 1 teaspoon of garlic powder.  Stir together.  Glaze will be thick.
Make sure your pork roast has any excess fat removed.

Coat the roast with the brown sugar glaze.
Place the roast in the center of the vegetables.

Clean, core, and quarter the apples, and place around the roast.

Bake in the 375 degree oven for about 40 to 50 minutes, (until the internal temperature reads 150 degrees at center of roast).
Remove from oven.  Remove roast.  If the vegetables still need a few minutes, place them back in the oven.  Mine were done within the 50 minutes.

Allow the roast to rest for 5 minutes, before slicing.
Notice how nicely browned this roast is on the inside, with less than 1 hour.  And it's very moist.  And the glaze on the outside is delicious.

If you have a larger crowd to feed, you can cook a larger roast, and increase the ingredients, or just add more vegetables.  People don't mind a small amount of meat, as long as they have plenty of vegetables on their plate.

Give this recipe a try, and your family will enjoy the new way of cooking pork roast.


Enjoy !

Friday, August 3, 2018

Chicken Jalapeno Popper Casserole

The garden is starting to produce this year, and one of those items coming out of the garden is peppers.  We love jalapeno poppers at our house, especially when done outside on the grill.  But, how about if you did the ingredients in a casserole, and added chicken.  Then you have a complete main dish.  Let me show you how I do it.
You will need:
2 pounds chicken boneless, skinless chicken breast, (or tenderloins)
garlic powder
salt  and pepper
onion powder
8 ounces cream cheese, softened
jalapeno peppers
4 ounces shredded cheddar cheese
1/2 cup crumbled crispy bacon
Preheat the oven to 375 degrees.  Spray a rectangle casserole dish with baking spray.

First, fry the bacon and allow to drain on a paper towel.
Crumble the bacon in bite sized pieces.  Set aside, this will go on top at the end.
Wash, remove the seeds, and slice the jalapeno peppers.
You will need at least 2, and can use as many as your family likes.  If you want the casserole with a little more heat, you can leave in a few seeds.  I like my poppers on the mild side, so I remove all the seeds and the membrane, (this is what holds the seed pocket in place inside the pepper).
Lay the chicken in a casserole dish along the bottom.  Today, I happen to have tenderloins on hand, so that is what I am using.  If you are using chicken breast, you will want to slice them in half or even chunks, to make them even for better baking.  You could even use skinless, boneless thighs.
Season the chicken with the salt, pepper, garlic powder, and onion powder - to taste.
Spread the softened cream cheese over the chicken.
Layer the jalapeno peppers over the casserole.
Sprinkle the cheddar cheese over the top.

You can use sharp cheddar cheese, or medium cheddar cheese - your choice.  I have even made this with a Mexican blend cheese.

Bake in the 375 degree preheated oven for 40 to 45 minutes.
Remove from oven, add the bacon, and return for 5 more minutes.

I test the temperature of the chicken to make sure it registers 165 degrees.

Your casserole is now ready to serve.
WOW is this ever good.  You get the moist seasoned chicken, the cream cheese cools any heat from the peppers, and of course cheese and bacon together make anything better.  This casserole doesn't last long around our house.

So next shopping trip, buy a few peppers and give this casserole a try.

Enjoy !

Friday, July 27, 2018

Sweet Cherry Quick Bread

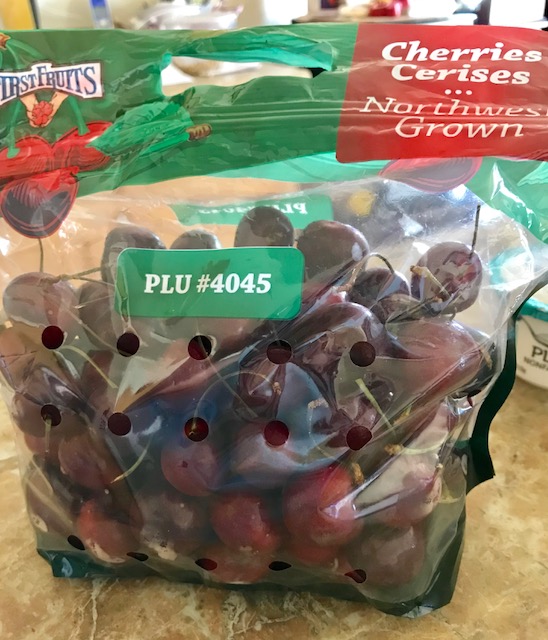
 Every couple of years sweet cherries are in abundance, and their prices go way low.  This summer their prices have been below $1 per pound.  And we have enjoyed eating them quite frequently.  I have also put several bags in the freezer for us to have during the winter months.  But sometimes, you need something new and different.  I am not a big fan of the usual breakfast items.  I love a slice of quick bread anytime of day for a fast snack.  So, with cherries in season and at a great price, I decided to make a sweet cherry quick bread.  It's very easy, and all the ingredients were already in the pantry.  Let me show you how I did it.

You will need:
1 cup of cherries, coarsely chopped
1/2 cup of softened butter
1 cup sugar
3 eggs
1 teas of vanilla extract
2 teas. of almond extract
2 cups flour
1/2 teas salt
1 teas baking powder
1 teas baking soda
1 cup plain Greek yogurt
2 cups powdered sugar
1/4 cup milk
Preheat the oven to 350 degrees.  Spray a bread loaf pan, (5 X 9), with baking spray.

Rinse, pit, and chop your cherries.  You will need 1 cup of chopped cherries.

If you don't have fresh cherries, you could always substitute frozen cherries that have been thawed.  But fresh will taste better.

In a large bowl, cream together the butter and sugar.
Add in the eggs, vanilla extract, and 1 teaspoon of almond extract, (you will use the other teaspoon for the glaze, later).  Continue mixing until smooth and everything is incorporated well.
In a smaller bowl, combine the flour, salt, baking powder, and baking soda.  Whisk together well to combine and break up any clumps.
Carefully add the flour mixture to the butter mixture.
Stir in the yogurt, until completely incorporated.
Fold in the cherries.
Spoon the batter into the greased loaf pan.  Bake in pre-heated 350 degree oven for about 50 minutes, (until a toothpick inserted in the center comes out clean).
 Allow the bread to cool on a baking rack for 15 minutes, then remove from pan.
Allow to cool completely.
 In a small bowl, whisk together the powdered sugar, remaining 1 teaspoon of almond extract, and milk.
Once the bread has cooled completely, pour the glaze over the bread.  Your bread is now ready to slice and serve.
I am going to put a few slivered almonds on top, so people will know there is an almond flavor in this bread.
Notice how nicely the bread has suspended the cherries throughout.  And notice how the layers are light and fluffy.
WOW - this bread is so moist, and you get that very slight tang from the yogurt, the sweetness from the cherries, and it's all tied together with the almond flavor.  This is wonderful.  And it keeps so well, without being wrapped.  Breakfast is going to be so good this week.

Get some sweet cherries, before they are all gone, and make a loaf for your family.

Enjoy !

Saturday, July 14, 2018

Date Nut Bread


Dates are in season, and the prices have dropped for a short time.  See all the different varieties available on the shelves reminded me of all the date inspired treats, during our visit to the Middle East last year.  One of my favorite was the Date Breads.  With some trial and error, I finally have a bread that our family enjoys.  Let me show you how easy it is to make.
 You will need:
8 ounces of dried pitted dates
1 large orange
1/2 teas. baking soda
1/8 teas. salt
1 cup boiling water
2 cups all purpose flour
1/2 cup firmly packed brown sugar
1 1/2 teas. baking powder
1/4 teas salt
1/2 teas ground cinnamon
1/2 cup cold unsalted butter
1 large egg, room temperature
1 teas. vanilla extract
1/2 cup pecans or walnuts
1 teas sugar

First, coarsely chop the dates.  Make sure to remove all the seeds.  You should have about 1 1/2 cups of firmly packed chopped dates.


Grate the orange peel, (you will need 2 tablespoons).  And juice the orange, (you will need 1/4 cup of juice).

Add enough boiling water to the juice to make 1 cup.
In a small bowl, add the boiling orange juice/water, baking soda, and 1/8 teaspoon of salt.  Add the chopped dates.  Stir well, then set aside and allow to cool.


 Preheat the oven to 350 degrees.  While the orange juice/water is cooling, spread the pecans, (or whatever type of nut you prefer to use), on a baking sheet.  Roast the nuts for about 5 minutes, until they start to brown, and you just start to smell the nuts.
Notice how the nuts have darkened in color.  Be sure to watch the nuts, they will go from roasted to burnt in just seconds.  Remove from oven and allow to cool.
In a food processor, add the flour, brown sugar, baking powder, 1/4 teaspoon salt, cinnamon, and orange peel.  Process just enough to combine.
Add the cold butter, and process until the mixture resembles coarse breadcrumbs.
This is what the flour mixture will look like.  Add the flour mixture to a large bowl.


Coarsely chop the nuts, and stir into the flour mixture.
 In a small bowl, add the egg and vanilla extract.  Whisk the egg and vanilla together.
Add to the flour mixture. 
 Add in the dates and ALL of the orange juice/water.
 Stir just until the mixture is combined.

Spray a bread loaf pan.  Add a piece of parchment paper to the bottom of the pan and spray the top of the parchment paper, (this will ensure the bread removes easily from the pan).
Spoon the bread dough into the bread loaf pan.
 Spread out and level the bread dough.
Lightly sprinkle 1 teaspoon of sugar over the top of the bread dough.

Bake in the preheated 350 degree oven for 60 to 65 minutes, (until a toothpick inserted in the center comes out clean, and the bread is golden brown).
Allow the bread to cool on a baking rack for about 10 to 15 minutes.
Remove the bread from the pan, and gently peel off the parchment paper.  Turn the bread upright and allow to cool completely.
Your bread is now ready to eat.

However, if you can resist the temptation and let your bread sit for 1 day, the flavors develop even more, and it's much more tasty.
Notice how nicely the dates and the nuts are suspended in the dough, and the bread has a nice crumb.
You can taste the slight orange flavor, the warm roasted nut flavor, and the warmth of the cinnamon against the dates, (which also have a delicious orange undertone).  It's so good!

And another way to serve the bread it with a small amount of honey on the slices - Oh my goodness, so good.

So go get some dates, while they are still in season and reasonable priced and try a loaf of date nut bread.

Enjoy !