Making good food at home without breaking your budget
Monday, June 29, 2015
Turkey Kofta
During our 2011 trip to Turkey, we fell in love with the gorgeous landscape, the history of the people, and we loved wondering through the marketplaces looking at all the wares for sales by the vendors and the spices for sale, (some never heard of in the United States, others very expensive at home, but inexpensive in Turkey). We were fortunate to share a traditional meal with a family during our trip, to "The City of Cherries", and we will never forget the experience. Every once in a while when I long to return to the Mediterranean area, I compensate by preparing a dish from the region. Today, I share with you my version of Koftas, made with ground turkey.
You will need:
1 cup finely grated fresh bread crumbs
1 pound lean ground turkey
1/2 teas salt
1/2 teas pepper
1 teas cumin
1/2 teas allspice
1 teas chopped fresh mint
2 cloves garlic
2 Tabs fresh parsley
1 egg
1 Tabs olive oil
For the 1 cup of bread crumbs, just take approximately 2 slices of bread and grind them in a food processor until they are finely ground, (approximately 10 - 20 seconds).
Next add your ground turkey.
You could also use lamb, (a more traditional meat), or ground beef.
Pulse until well blended.
Rough chop the garlic and parsley.
Add the egg, garlic, parsley, salt, pepper, cumin, allspice, and mint.
Process until a fine texture.
It will look very much like a meatloaf mixture.
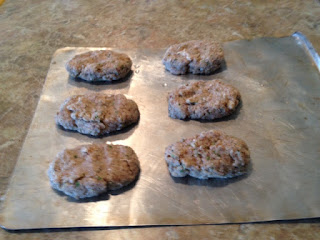
Form into a small palm size loaf, (not to thick).
You will get 6 to 8 loafs. Place them on a baking sheet. I then refrigerator mine for at least 30 minutes to set up the meat mixture, (but you can cook them immediately if you want).
In a heavy bottom pan, (I like to use a cast iron pan), heat the olive oil. and cook the kofta until golden brown and cooked thoroughly.
They will look nice and brown on the outside. And they are ready to serve.
I am serving mine with stuffed grape leaves, hummus,homemade pita bread, a quick tahini sauce, (1/2 cup plain Greek yogurt, 2 Tabs tahini, 1 teas lemon juice, a dash of red pepper, 1 minced clove of garlic - whisked together until blended and chilled). Mixed olives with feta cheese, a tossed green salad with a Greek dressing, and as is traditional, a bowl of iced cherries for dessert.
Give these a try.
Enjoy!
Monday, June 22, 2015
Applesauce Cake
Since I usually always have apples on hand, I pretty much always have applesauce on hand also. When my apples start to get a little past their prime, I core them, cut them into quarters, add a little water and cook them until they are just softened. Drain off the liquid, and puree them. Instant unsweetened applesauce ready to eat or use in many of my recipes.
One of our favorites, is applesauce cake. It's quick and can be thrown together in a matter of minutes.
You will need:
2 cups all purpose flour
2 teas baking soda
1 teas baking powder
1 1/2 teas cinnamon
1 teas grated nutmeg
1 teas allspice
1/4 teas ground cloves
1 cup raisins
1 cup chopped nuts
1 stick butter (1/2 cup)
1 large egg, room temperature
2 teas vanilla extract
2 cups applesauce
1 tabs confectioner's sugar
Preheat your oven to 350 degrees
Spray a 9 X 9 inch pan with baking spray, then sprinkle lightly with granulated sugar around the inside of the baking pan. (Note: I prefer using sugar instead of flour for this cake, but if you want to use flour you can.)
In a medium bowl, combine together the flour, baking soda, baking power, cinnamon, nutmeg, allspice, and cloves. Whisk together.
In a large bowl, cream together the butter and sugar until light and fluffy.
NOTE: Make sure your butter is softened, so it will cream easier.
On low speed, beat in the egg.
Now slowly add 1/3 of the flour mixture.
Next add in 1 cup of the applesauce.
Add in another 1/3 of the flour mixture.
Add in the remaining applesauce.
Add the balance of the flour mixture.
Lastly add in the vanilla extract.
Now stir in the nuts and raisins.
Note: you can use walnuts, pecans, or whatever type of nuts you would like.
Turn the batter into the greased baking pan.
Bake for approximately 45 - 60 minutes, until the cake is cooked.
When a toothpick inserted into the center of the cake is removed, it should remain clean - your cake is now done.
Cool on a baking rack.
Once the cake is cooled, sprinkle 1 Tablespoon of confectioner's sugar into a sieve and sprinkle over the top of the cake.
NOTE: this is an optional topping, but I think it adds a nice touch.
Notice how nice an moist and fluffy the cake is.
The cake is a nice dessert, or an anytime snack.
The nuts and raisins are scatter throughout nicely.
I have even chopped up apples and thrown them into the cake for a special treat. You can change up this cake in so many different way. These old recipes are so versatile, and still as good today as they were 50 years ago when my grandmother made them for me as a child.
Enjoy!
Monday, June 15, 2015
Strawberry Shortcakes
Summertime means strawberry season ! And whether your lucky enough to have them in your garden, or can get them at the farmer's market for a good price - nothing says summer like strawberry shortcakes. And the secret to a good strawberry shortcake is in the biscuits. I remember my aunts making these delicious shortcakes when I was a child, and they are so much better than the dry grocery store sponge cakes that you get now days. And they're very easy and quick to make.
For the biscuits, filling, and topping - you will need:
3 1/2 cups all purpose flour
1 teas salt
1 Tabs baking powder
1/2 teas baking powder
1 cup buttermilk
3 Tabs + 1/2 cup + 1 teas granulated sugar
1/2 cup butter (1 stick)
2 teas vanilla extract
1 large egg
2 quarts strawberries
2 teas lemon juice
1 cup whipping cream
First, I cut the butter into small cubes - then I put it back into the refrigerator, (to keep it cold, so it cuts into the flour mixture better).
Preheat the oven to 425 degrees.
Into a large bowl whisk together the flour, salt, baking powder, baking soda, and 3 Tablespoons of sugar.
Now cut the cold cubed butter into the flour mixture, until the mixture resembles small peas. (I just use my fingertips for this, but you can use a pastry cutter or 2 knifes).
In a measuring cup, measure out 1 cup of buttermilk. Whisk in 1 large egg.
Next, whisk in the vanilla extract.
Add the milk/egg mixture to the flour mixture. Stir just until the milk mixture is incorporated, and forms together.
Turn the dough out unto a floured surface, and knead only 4 or 5 times. (You don't want to overwork the dough).
Now start patting the dough out until it's about 1/2 - 3/4 inches thick.
Cut the dough with a biscuit cutter, or large round sharp cooking cutter. You will get about 12 biscuits.
Place the biscuits on an ungreased baking sheet.
I like to sprinkle just a light coating of sugar on top of the biscuits. You can even lightly coat the tops of the biscuits with milk or egg white if you want a shiny top.
Bake for 10 to 12 minutes, until the tops are nice and golden brown.
While the biscuits are cooking, make the strawberry filling.
In a medium bowl, slice 1/2 quart of strawberries.
Mash these strawberries.
Now slice the rest of the strawberries, and add them to the bowl with the mashed strawberries.
Add the 2 teaspoons of lemon juice.
Add 1/2 cup of sugar.
Stir the strawberries well. Set the strawberries in the refrigerator.
By now the biscuits are done, and they look good. They have a nice golden color and are cooked completely. Remove from the oven and let set for 2 minutes.
Then remove the biscuits to a cooling rack.
See how nice and high the biscuits have risen ! You can even see all the flaky layers in the biscuit.
While the biscuits are cooling - let's make our whipped topping.
Measure 1 cup of whipping cream into a bowl.
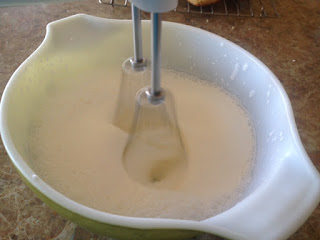
Start beating on low. Once the cream starts forming soft peaks add the remaining 1 teaspoon of sugar.
Turn the mixer up to medium and continue beating until your whip cream has developed nice soft peaks.
Here's my whipped cream, with the little touch of sugar, (which makes it very tasty).
Let's start assembling our shortcakes. First slice the biscuits in half.
Place the bottom biscuit in the serving dish.
Now add some of the strawberry mixture. Don't forget to add some of the juice, (the biscuits will soak up the wonderful strawberry flavor - yummy).
If you want, you can add some of the whipped cream also.
Add the biscuit top on the strawberry filling.
Add some more strawberry mixture.
And finally your whipped cream on the top.
Then I like to add a slice of strawberry on top.
Now doesn't that say "Hello Summer".
Let's dig in !
If you happen to have leftover biscuits, just store them in a zipper top bag, and they will stay fresh for several days. I put the rest of the berries and the whipped cream in a covered container in the refrigerator. They keep well for several days.
Then when we feel the urge for a strawberry shortcake, we just throw one together in a minute, and enjoy!
Now hurry and find your strawberries before the season is over, so you can also enjoy this wonderful summertime treat.
ENJOY !!
Subscribe to:
Comments (Atom)


